The lines have fallen to me in pleasant places; Indeed, my heritage is beautiful to me. ~ Psalm 16:6 nasb
Showing posts with label cooking tips. Show all posts

Sunday, October 14, 2012

A Week's Worth of Salad

I saw an idea on Pinterest, and wanted to expand on it, maybe modify it a bit, and try it out for myself.

I needed some quart-sized Mason jars, which I already had in abundance, and salad ingredients.  The idea on Pinterest was to layer the salad into jars, starting with dressing at the bottom, then crunchy veggies (carrots, celery, etc.) which don't wilt in the dressing, then lettuce and other toppings.  Do this in assembly-line fashion with several jars, and you have ready-made salads!  Just dump them out and munch and crunch away.

I'm usually home when it's lunchtime, so I figured I'd leave the dressing out and just layer all the salad ingredients--minus tomatoes, since the jars are stored in the fridge and I prefer fresh-cut tomatoes on my salads.  I used my canning funnel, and started with celery and carrots.  I chopped all the celery, and layered it in the bottom of each jar.  Then I worked my way through each ingredient, layering them one layer at a time in each jar:

1.  Dressing.
2.  Celery and carrots -- crunchy veggies on the bottom won't wilt in the dressing.
3.  Sweet peppers
4.  Chopped lettuce
5.  Cucumbers
6.  Tomatoes -- this is where I'd put them so they don't wilt the lettuce.
7.  Olives
8.  Cubed cheese

Here's what my jars looked like:


Another note on salad dressing:  If you really don't like the idea of the dressing being in the jars, use a small jar such as a clean spice jar.  If you find, like I did, that the jars aren't completely full, you can put the dressing jar on the top of your salad.  Or, fill snack-sized zip-seal sandwich baggies.  Even smaller are the craft-type zip-seal bags (I have some that are 2x3" that will hold about two tablespoons of dressing, which should be plenty for one salad).

If the jars don't seem quite full, let me say one thing:  If you fill the jars to the top, you will have an awfully massive salad to eat.  What is in one jar above filled an 8" luncheon plate, piled high.  It's all vegetable, except for the cubed mozzarella cheese on top.  Very filling.  Remember that the lettuce gets compacted, so just be careful about filling the jars.  Unless, of course, you enjoy a very large salad!  (Or want to use these for dinners, with a layer of chopped, cooked chicken--another great idea!)


I love opening the fridge, pulling out one of these jars, dumping it on a plate, quickly cutting up a garden tomato on top, and adding dressing.  I have a great salad in just a minute!  At the end of the week, even the last jar--I usually make about five at a time--is fresh!


Back to life,
Christine

Visit my photography blog
Visit my photography website

Saturday, December 31, 2011

Merry Merry Muffins!

I've been on a muffin kick lately.  This is my second muffin recipe post in a row!


I actually found and modified this recipe last year, so when this year's Christmas season rolled around, I pulled the recipe back out and made some again, except I made mini muffins--lots of little yummy!

This recipe began as an eggnog bread recipe.  Quick bread recipes are a cinch to turn into muffin recipes--just use muffin pans instead of bread pans, reduce the baking time, et voilà!   I added banana to this recipe, which, in combination with the eggnog and its spices, gives this recipe a wonderful taste that even non-eggnog lovers will love.  I'm proof of that!

Here is my "new and improved" recipe.

Banana Eggnog Muffins
makes twelve muffins

2 eggs, beaten
1/2 cup butter, softened
1 cup cane juice crystals (or white sugar)2 ripe bananas, mashed
1 cup eggnog (I used Oberweis eggnog)
1 teaspoon vanilla extract

2 1/2 cups freshly ground whole-wheat flour (or 2 1/4 cups white flour)
2 teaspoons baking powder
1/2 teaspoon salt
dash freshly ground nutmeg (freshly ground is very strong, so go easy!)

Preheat oven to 375 degrees.  Line 12 muffin cups with muffin papers.  Blend together the eggs and butter.  Add cane juice crystals and beat.  Mix in bananas, eggnog, and vanilla.

With whisk, stir together the flour, baking powder, salt, and nutmeg.  Add to wet mixture and stir just enough to moisten and until all has been mixed together.  Pour evenly into muffin cups.  Top muffins with turbinado sugar ("sugar in the raw"), or cinnamon/sugar, or leave plain.

Bake about 20 minutes or until golden and they test done with a toothpick.  Let cool on wire rack.  These muffins freeze great.

Banana eggnog muffins


Back to life,
Christine

Visit my photography blog
Visit my photography website

Tuesday, November 8, 2011

An Apple Update!

Boy, I haven't blogged in a while!  If it weren't for my Tea Talk posts, I wouldn't have blogged at all!  I had uploaded some photos from October, then never created posts for them.  So I guess I'll have to play catch-up now...

Back in October, we went to pick apples with church friends.  So we had all those apples sitting in our basement, and I knew I better process them quickly.  The M. family, with whom we spent most of that day picking apples, came over to watch me make and can applesauce.  The girls had not canned before and wanted to see how it was done.  I was so blessed to have them pitch in and do some of the work!  Here's the story...


Joseph, my very willing kitchen helper, and I started the peeling process early that Saturday morning.  I love my Pampered Chef apple peeler/corer/slicer.  It made fast work of all my Jonathon apples.  We put the slices in water with lemon juice added while we prepared the rest of the ingredients for pie filling.


Once I had enough apple slices for one pie, I drained the apples and placed them in another bowl.  Then I dumped in the cinnamon/sugar mixture Joseph had prepared, plus cut-up butter pieces.  Stir well!


Then we poured the apple pie filling into gallon-sized freezer bags.  To get as much air out as possible, I tried a neat trick which really worked.  Once the filling is in the bag, seal almost all of the zipper seal.  Insert a drinking straw and continue zipping until the straw is snug.  Suck out as much air as you can, then remove the straw and quickly seal the rest of the zipper seal.  It's almost as good as a vacuum seal, and the bags store nice and flat in the freezer.  We ended up with eight bags of apple pie filling.


The M. family helped me with the applesauce and canning portion of the day.  My arm got tired of stirring, cranking apples through the food mill, and stirring again.  I'm afraid I burned the applesauce, too!  Kelle was such a dear to help stir, crank, and stir some more.  She blessed me big time!


I sure hope the M. ladies learned as much in the same quantity as I was blessed with their help!  The first batch of jars came out of the canner sticky and messy, so I was surprised when they all sealed nicely.


The next day, after Sunday church service, I gently rinsed off each jar under lukewarm water, then dried them off.  Don't they look pretty all sitting in rows?


Blessings from that canning day:  help with apple peeling and pie-filling making, friends to visit with, ladies in my kitchen, help with canning, teaching and learning opportunities, 17 pints of applesauce put up for winter, satisfaction from a hard day of kitchen work...  Thank You, Lord, for all the blessings of the day!!


Back to life,
Christine

Visit my photography blog
Visit my photography website

Friday, October 21, 2011

A Hearty Soup for Autumn

Plans4You

"There is rhythm to being a farmgirl.
It is the rhythm of working hard when there is work to be done.
It is the rhythm of finding joy in the "doing" of the work.
It is also the rhythm of slowing down to enjoy each moment."
Rene Groom

I'm linking up with Lori's Friday Farm Girls @ Heart today.


I thought I would post a recipe today.  I'm feeling cold, and rightfully so--the thermometer has been in the 40s and 50s whenever I've checked!  Still, there has been no hard frost yet, which is good because I still have a few herbs in the garden to process!

With the cold days, and especially with the wind that has recently been howling, it's a great time to break out the soup recipes as I plan our family's weekly dinners.  This particular soup is one of our favorites, and just by looking at the title, you'll be able to tell why my guys love it so much.  It's also very easy to make.

This soup can also be healthy with just a bit more planning.  Dry beans are cheaper and healthier than canned, so plan this soup a day in advance so you can soak the beans overnight.  When I soak and prepare my beans, I double the amount I need, because you can freeze cooked beans!  Then the next time I need beans, or make this soup, I can simply pull the beans out of the freezer to defrost.  Healthy, and easy!  We've put up lots of tomato products for the winter, so it's easy to pull out those jars for the spaghetti sauce.

No matter how you make it, it really is a quick recipe.  My boys make this on their own, which frees me for other things instead of meal preparation.  Like blogging.  :)


Easy Taco Soup

1 pound hamburger, cooked and drained
2 cups water
3 cups spaghetti sauce (about the size of a typical store-bought jar)
3/4 cup dry beans (soak overnight, change water, simmer until soft; substitute 1 can beans, drained)
1 packet taco seasoning mix (we use 3 T of our homemade taco seasoning)
1 T chili powder
1/4 teaspoon salt

Mix all together and simmer for 15 minutes.  Serve with cheddar cheese, sour cream, and other taco toppings if desired.  Also may serve with tortilla or corn chips.


She rises also while it is still night
And gives food to her household
And portions to her maidens.

Proverbs 31:15 NASB


Back to life,
Christine

Visit my photography blog
Visit my photography website

Friday, August 5, 2011

From Scratch --Thoughts and Tortillas

~~ Once again, I promise there's a recipe at the end!!! ~~ 

Plans4You

I'm linking up with Lori's Friday Farm Girls @ Heart today.


From scratch.  In sports, "to begin again."  In cooking, "from basic or unprocessed ingredients."  Now, I know there is a lot of quibbling about true from-scratch cooking.  If I make a pie with X-Brand ice cream and Cool-Whip, with my own homemade crust, is it from scratch?  Is it homemade?

If we stick to the literal meaning of from scratch, almost no baked/cooked items would truly be from scratch.  I use store-bought mustard, ketchup, and vinegar, to name a few not-from-scratch ingredients.  But let's not stick with the literal meaning; it's too overwhelming to think about making vinegar (though I just saw a Mennonite family's homemade mustard at the farmers market yesterday, and now I'm wondering maybe...).  Plus, I have my own standards and time constraints--and you have yours.  We do what we can, how the Lord is leading, and leave the rest to Him.  :)

Sorry for the above tangent.  For me, typing = thinking, and sometimes my brain goes off on sidetracks of ideas and who knows where they'll take me!  Concentrate, Christine--tortillas.

There--I added a photo to help me concentrate on TORTILLAS

Sooo...I added up how much we spend per month on tortillas, and it was rather shocking.  Hey, we're a Mexican family; tortillas are an everyday part of our diet.  I also realized that we have wheat berries that can be ground into flour, and tortillas are made from flour--the flour tortillas, anyway, not the corn ones.  ;)  So, couldn't I just make my own tortillas?  I know there's rolling and dry-frying involved, both of which take time, but I'm also spending an hour or so here typing up this blog, which means I have some extra time.  I did lead a life devoid of computers about 10-12 years ago, and I did just fine filling my time with important activities.  I think this is another tangent...

My friend Becki gave me a recipe for whole-wheat flour tortillas, and I dug it out of my recipe binder.  Four ingredients--easy.  Long directions--whoa.  But.  I have a Bosch, which makes the kneading part a no-brainer:  I can wash dishes while it does the kneading.  Let dough rest--planning and time are involved.  But I know that planning and time are involved in all homemade cooking, so I already anticipate adjusting my schedule accordingly.

Oh, wait.  You're expecting a recipe.  Enough with the words already, Christine.  Here's the recipe!


Whole-Wheat Flour Tortillas (Flat Bread)

2 1/4 cups whole-wheat flour
1 teaspoon salt
1 tablespoon oil or melted fat (I use lard--the good stuff, or bacon fat)
1 cup tap water

Mixing with the Bosch (or bread machine/KitchenAid/etc.):  Measure all of the ingredients into the machine's bowl/bread pan.  Start the machine and allow it to mix and knead the dough for you.  Set your timer for 10 minutes, or watch the clock.  Keep an eye on the consistency of the dough.  If it is too wet-- add more flour, or too dry--add more water, both a little at a time.

At the end of ten minutes, I remove the dough from the bowl and hand-knead it a few times.  I have found that the dough is usually very soft (I probably didn't add enough flour), so I hand-knead just a little bit of flour in, then shape it into a large ball, fold a towel around it, and let it rest.

Divide the dough into 8 pieces (you can divide into 10 pieces for smaller tortillas, but I have found 8 pieces to work nicely).  Shape each piece of dough into a ball, then roll out into a flat, thin circle, maybe 8" in diameter.  I flour my countertop to do this, as my dough is usually a little sticky; the extra flour doesn't hurt at all.

Heat a dry cast-iron skillet over medium-high heat.  When it is hot, place one of the circles on it.  Cook until it's a little puffy and has brown spots, then flip it and cook the other side the same way.  I put the cooked tortillas inside a folded towel to serve them warm.


To make fry bread, simply slip a prepared circle of rolled-out dough into about a 1/2 inch of hot oil (375 degrees) in a skillet.  Submerge it in the oil until it bubbles up and puffs all over.  Flip it and brown the other side.  Drain on paper towels.


I'd like to try the hot-oil fry method, but also add cinnamon and sugar on the tortillas to make a sweet, crispy dessert, with too many calories, of course, but oh, so good!

Taco Night with homemade tortillas


¡Que pase un buen día en Jesucristo nuestro Señor!

(May you have a good day in Jesus Christ our Lord!)


Back to life,
Christine

Visit my photography blog
Visit my photography website

Friday, July 29, 2011

Slow Cooker Baked Beans

Plans4You


I'm linking up with Lori's Friday Farm Girls @ Heart today.
Click on her button above to read more Farm Girl posts and to participate with us.


Time for a recipe!  This particular recipe combines my love of slow cooking with my love for homemade and my love for easy!  Okay, I know, you saw homemade and you saw baked beans and you saw easy and you rolled your eyes at me.

It really is just a few steps to make your own baked beans.  And it's easy, as with all homemade meals, if you think a day ahead.  I usually have an idea in my head for the meals I'm going to make during the week.  I also have a place on my planning calendar within each day's square where I write down the dinner I've planned--I usually jot down just a main dish, not necessarily the sides, which tend to be what I have on hand, such as salad, veggies, bread, or rice.

I knew we were going to have burgers on Sunday, because Lori's Bryan was coming over to hang out with my guys.  Baked beans is a nice complement to that meal, also nice since there probably would be leftovers, or highlights as we call them, for later in the week.  I soaked the beans overnight Saturday, then rinsed and simmered them Sunday morning.  I also placed all the sauce ingredients in a saucepan Saturday night, covered it, and left it on the stove to heat up the morning.  Sunday morning, after the beans were done simmering, I tossed them into the slow cooker with the heated sauce, turned it on low, and voilà!  Nothing more to think about until later Sunday afternoon.

Here are the easy recipe details!


Slow Cooker Baked Beans

3 cups dry navy beans, sorted to remove debris and bad beans
1 small/medium onion, finely diced (I purée mine due to onion-dis-likers)
6 tablespoons molasses
4 teaspoons salt
1/2 teaspoon ground black pepper (less if using fresh from pepper mill)
1/2 teaspoon dry mustard
1 cup ketchup
2 tablespoons Worcestershire sauce
1/2 cup sucanat (original recipe called for brown sugar)
1/4 cup bacon drippings or rendered fat (rendered pork lard--the good stuff, not Crisco)

Place sorted beans in saucepan; cover with water and let sit overnight, at least eight hours.  Drain, rinse, cover with fresh water, bring to a boil, and simmer 1-2 hours or until tender.  Drain, reserving the liquid.

Arrange the beans in the slow cooker, layering the onion in-between.  In the saucepan, place the remaining ingredients and heat to boiling, stirring occasionally.  Pour slowly over beans in slow cooker.  Pour enough reserved bean liquid to cover the beans, and set the remainder aside.  Cover and cook the beans on low for about 8 hours, or on high about 4 hours.  Add more bean liquid if the beans dry out.


Remember, easy homemade is just a couple of extra steps away!

Yummy baked beans--made organically!!

Back to life,
Christine

Visit my photography blog
Visit my photography website

Friday, October 8, 2010

Soup's On!

Chicken soup with pasta.

During the fall and winter months, it's so nice to have soup for dinner.  In past years, we designated Tuesday night as soup night.  I haven't gotten into the Tuesday groove yet, but we've had soup several times now.  Homemade chicken soup is the best, and the easiest to make!

At our farmers market, Fernando and I visit Eric and Samantha from Nature's Choice Farm.  They raise 100% grass-fed cattle, plus free-range chickens and pigs.  We buy their farm-fresh eggs and whatever meat we can afford  Their prices are high, but as I've heard, good food isn't cheap, and cheap food isn't good.  This time, I asked Eric for the biggest chicken he had.  Well, they raise 'em big on their farm--it was nine pounds!

On Sunday evening, I put it in a large pot, covered it with filtered water, and simmered it all night.

Chicken simmering on the stove.

About lunchtime, I removed the chicken and bones from the stock, and let everything cool down a bit.  I strained the stock, return in to the pot, and de-boned and chunked up all the chicken.  I froze three portions of cooked chicken for future meals, and saved a portion for my soup.

Late afternoon Monday, I got the stock boiling again, with a little salt and organic chicken soup base added.  Once it was boiling, I added carrots chopped by Joe!  He was so sweet to help me pull out the rest of our garden carrots and wash them, too.


I kept this soup simple, but I love to add chopped onion, celery, and any other vegetables that I have on hand.  The stock simmered for several minutes until the carrots were tender, then I added cooked whole-wheat egg noodles (I like to cook my pasta separately, then add it to the stock).

Since you can't have chicken soup without herbs, I picked some fresh garden parsley.


Thomas, my official kitchen helper for the year, added the parsley.  Not only is he my kitchen helper (it's home-ec class!), he has become my photography assistant, since I can't add parsley and take a picture at the same time.  :)


When we have soup for supper, we always have a peanut-butter-and-jelly sandwich.  This tradition was established growing up in my family, and it is now cemented in our own family--no matter the soup!


More recently -- chicken soup with orzo!

Truly yummy -- leftovers all week long!!


Back to life,
Christine

visit my photography blog!
Christine Anne Photography

Friday, October 1, 2010

FFG--Chilly Mornings and a Harvest Breakfast

This post has been updated to reflect corrections
in the recipe below!!!

Plans4You
Welcome to another Friday Farm Girls at Heart!  Visit Lori's blog (click on her FFG button at right) to find out what it's all about!

Sometimes I chuckle as I write my Farm Girl posts, as I have no desire to live on a farm, drive a tractor, or milk a cow.  But my passion is everything at home--gardening, crafts, creating delicious meals, even cleaning--so there is a little bit of farm girl in my heart!

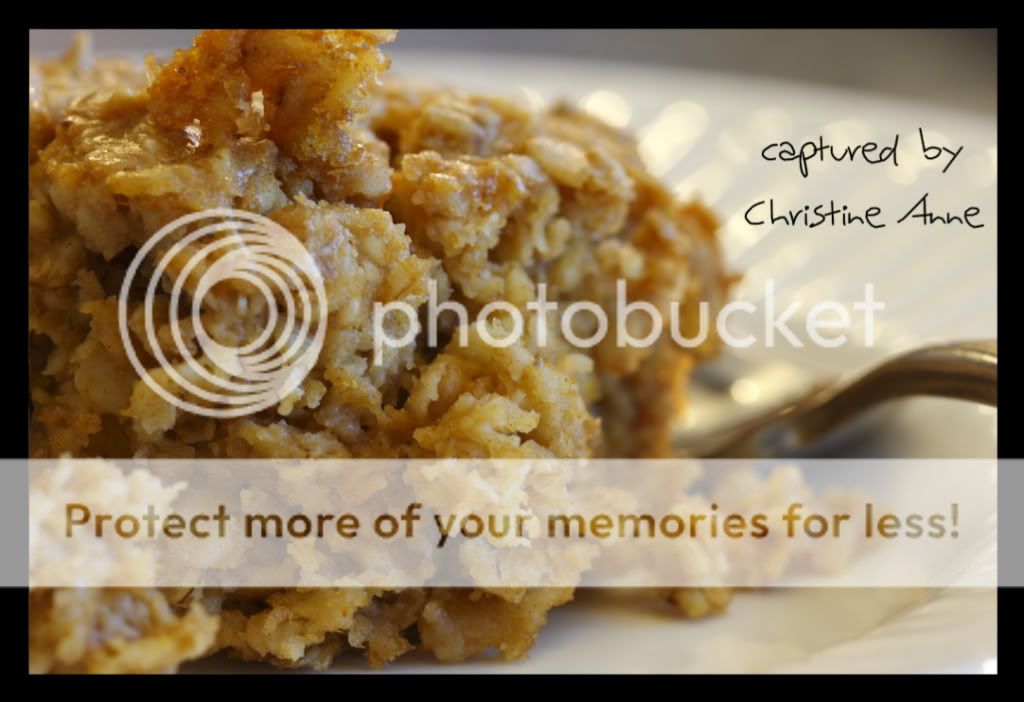
Now that mornings are chillier, I'm thinking about harvest, and baking, and lovely kitchen aromas.  My friend Stacy posted a recipe for baked oatmeal, which she tweaked to her family's liking.  I have tweaked it to my own family's liking, in honor of the harvest season, and below you will find my version.  You can find her version here.


Breakfast preparation the night before

I love breakfast recipes which you can partially make the night before.  It shortens the morning prep time and breakfast can be ready in a jiffy.  If you follow a recipe for any of the following examples, make sure your cookbook is also out the night before and opened to the correct page:

  • Muffins--Mix the dry ingredients the night before.  Measure any wet ingredients into prep bowls, cover, and leave in fridge.  Set out muffin pan and line with cupcake papers.
  • French Toast--Set out griddle or frying pan, bowl for egg, fork, and flipper.  I also set out cinnamon, which I put in my egg mixture.  If bread is homemade, make sure it's sliced.
  • Pancakes--Mix the dry ingredients the night before, same as muffins.  Set out griddle, fork for mixing, and pancake flipper on the counter.  Set out measuring cups and spoons for wet ingredients.
  • Oatmeal--See below for the recipe! 


Autumn Harvest Baked Oatmeal

The night before, combine:
3 cups rolled oats
2 cups buttermilk (or 2 cups milk + 2 T buttermilk, kefir, or yogurt)

Mix together and set aside until morning:
1 1/2 t cinnamon
1/4 t ginger
2 t baking powder
1 t salt
dash nutmeg (I grate mine fresh)
dash cloves

In the morning, preheat oven to 350 degrees, and mix together in a bowl:
1 t vanilla
1/2 cup butter or coconut oil, melted
1/3 cup sucanat (or brown sugar)
2 eggs, beaten
1/3 to 1/2 cup pureed pumpkin

To this mixture, add the oat mixture and the dry ingredients.  Pour into a buttered 11x7 baking pan and bake at 350 degrees 25-30 minutes.  Top with fruit, chopped nuts, ground flax seeds, warm milk, or drizzle with warm maple syrup.


Back to life,
Christine

visit my photography blog!
captured by Christine Anne